The 15 minutes at a glance
| Minutes | What you do |
|---|---|
| 0–3 | Set up a table next to a window, lay down the background, wipe the phone's lens. |
| 3–11 | Photograph eight products, about a minute each, from the same spot. |
| 11–15 | Choose the best shot of each, then straighten, crop and adjust the brightness. |
Eight products make a good first batch. Once the set-up is in place, the next batch takes even less time. Wiping the lens is not a joke, by the way: a phone that lives in an apron pocket next to flour or soil gives hazy photos.
Light: a window, not a flash
Light matters more than the phone. The best light for products is daylight from a window, from the side, on a bright day but out of direct sun. It is soft, it shows texture (the crust of a loaf, the shine on a glaze, the petals of a peony) and it costs nothing.
- Turn off the flash and the ceiling lights. Mixing daylight with warm bulbs gives orange and blue patches that are hard to correct.
- Place the product side-on to the window, about an arm's length away. Light from behind you flattens everything; light from behind the product turns it into a silhouette.
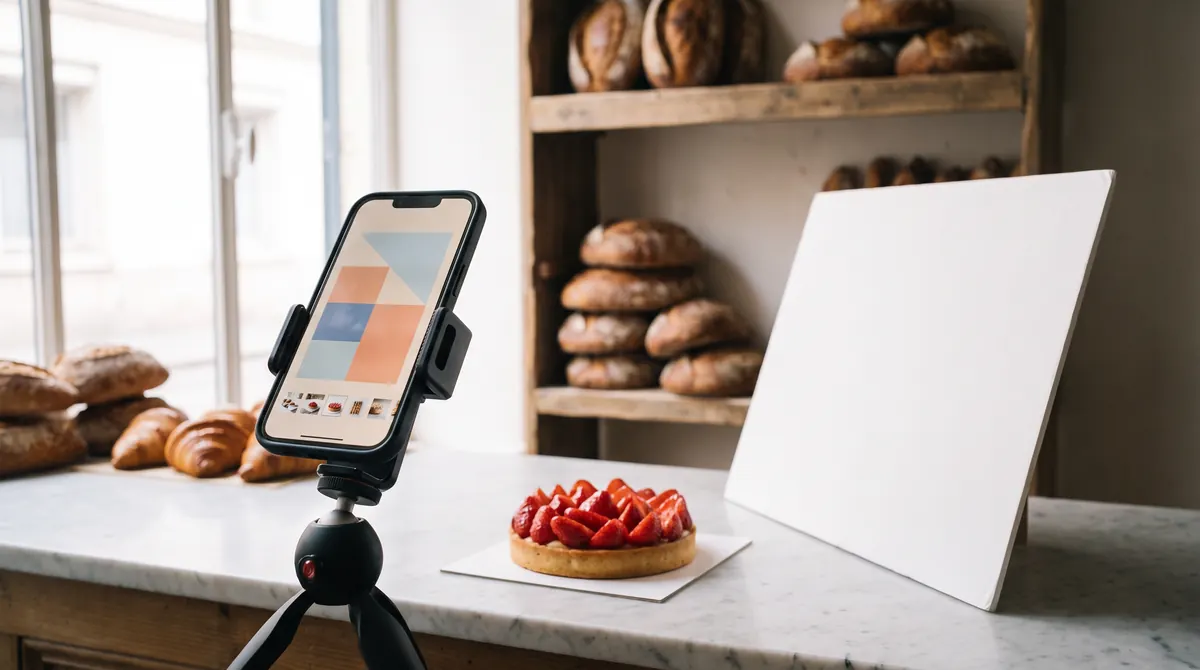
- Use a white card as a reflector on the side opposite the window to soften the shadows. A sheet of A3 paper or a piece of foam board does the job.
- If the sun shines straight in, hang a thin white curtain or a sheet of baking paper over the window.
- Shoot at the same time of day every time. Mid-morning is reliable, and your photos will match.
Background and props
A plain background keeps the attention on the product and makes a range look consistent. Choose one and keep it:
- White or light grey card, curved up behind the product so there is no visible line. Clean, and it suits almost everything.
- A wooden board or a marble slab for food. Warmer, still simple. Use the same board for every photo.
- A plain wall for tall items such as bouquets, photographed at eye level.
Props are optional. If you use them, keep them few and relevant: a linen napkin under a tart, a sprig of rosemary beside a cheese, a bread knife next to a loaf. Nothing a customer could mistake for part of what they are buying.
Wine, beer and spirits. Show the bottle, the label and the case. In France, the Loi Évin limits alcohol advertising to objective information about the product, so leave out drinking scenes and lifestyle shots. Our guide to selling wine online in France has the details.
Three angles that work
Most products look right from one of three angles. Pick the one that shows what the customer cares about:
- Straight on, at eye level, for anything with a front: bottles, jars, boxes, bouquets, tall cakes. Hold the phone level so the sides of a bottle stay straight.
- At 45 degrees for most food: a tart, a loaf, a cheese, a box of chocolates. It shows the top and the side, the way a customer sees the counter.
- From above for flat things and assortments: a platter, a box of bonbons with the lid off, a vegetable basket, a set of plates.
Then add one close-up where texture sells: the crumb of a sourdough, the inside of a cheese, the glaze on a bowl. Customers like to see what they will taste or touch.
A few trade-specific tips:
- Bakery: put a cut loaf next to a whole one, and photograph viennoiseries in the quantity sold (six croissants, not one).
- Cheese and charcuterie: cut a wedge to show the inside, and keep the rind or label of the whole piece visible.
- Flowers: shoot bouquets at eye level against a plain wall, in a simple vase or in the wrapping customers receive.
- Wine and beer: label centred and straight. To avoid the window reflecting on the glass, turn the bottle slightly or place a black card just out of frame.
- Farm boxes: from above, with every product visible, so customers see what a ‘small’ and a ‘large’ basket contain.
Fill the frame without cutting the product off, and leave a little space around it so the photo can be cropped square. Use the phone's standard (1×) or 2× lens rather than the ultra-wide, which distorts objects up close. Tap the screen on the product to focus, and keep still: lean the phone against a glass, or use a small tripod.
Consistency across your range
A shop where every photo has the same light, background and framing looks more professional than one with a few brilliant photos and many average ones. To keep things consistent:
- Mark the spot. A piece of masking tape on the table for the product, another for the tripod or your elbow.
- Use the same angle for the same kind of product: every bottle straight on, every cake at 45 degrees.
- Keep the same distance, so a small jar doesn't look as big as a large one. A familiar object in some photos (a hand, a knife, a glass jar) helps to show the size.
- Shoot the whole range in one session when you can, and write the set-up down so next season's products match.
- Show what the customer gets. If a bouquet comes in three sizes, photograph the three side by side, or say clearly which size is shown.
Editing in two minutes
The editor built into your phone is enough. For each photo:
- Straighten, so the edge of the table and the sides of bottles are level.
- Crop to a square (1:1) or a portrait 4:5, with the product in the middle and a little space around it.
- Adjust the brightness slightly if the photo looks grey. White should look white.
- Correct the warmth if the photo looks too blue or too orange.
Skip filters and heavy saturation: the product in the photo should look like the product on the counter. A customer who receives the cake they saw is delighted; one who receives a duller version is not.
Sizes and sending the files
Photos from a recent phone are large enough for any online shop, usually 12 megapixels or more. A few practical points:
- Square or 4:5 portrait works best in a product grid. Landscape photos get cropped.
- At least 1,200 pixels on the short side keeps photos sharp on large screens; 2,000 pixels is plenty.
- JPEG is the safest format. iPhones save photos as HEIC by default; most services accept it, or choose ‘Most Compatible’ in the camera settings to save JPEG instead.
- Send the originals. Messaging apps often compress photos. Email, a shared folder or a file-transfer link keeps the full quality.
- Name the files after the product (‘bouquet-medium.jpg’). It saves time for everyone.
And keep it up: when a seasonal product arrives, photograph it on the same table, in the same light. Your shop will look as if it was shot in a single day. If you sell flowers, our page for florists shows how a Shop tab presents bouquets in several sizes.
Send us the photos, we do the rest. When we set up your Shop tab, we put your products, photos and prices online for you, and phone photos are fine to start with. No setup fee, no monthly fee: 2.5% per order, capped at €49 a month. See how it works, or browse the demo stores to see product photos in a real shop layout.